


Cast iron Dutch ovens, if properly cared for, will last for many generations. Constant and proper Dutch oven care beginning from the day the oven is purchased will keep it in service for many years. All quality ovens are shipped with a protective coating that must be removed prior to seasoning. Removing the protective coating requires a good scrubbing with a little soap, some hot water, steel wool, and a little elbow grease. This is the only time you will ever use soap on your Dutch oven. Once the oven has been cleaned, it should be rinsed well, then towel dried and allowed to air dry.
You can use your kitchen oven to season a Dutch oven but just a word of warning, You will smoke up your house if you season your Dutch ovens indoors. I recommend using an outdoor gas barbecue in a well ventilated area. Preheat your barbecue or kitchen oven to 375°. After your Dutch oven is dry, place it on the center rack with the lid ajar. Allow it to warm slowly so it is just barely too hot to handle with bare hands. This preheating does two things, it drives any remaining moisture out of the metal and opens the pores of the metal.
Note: You can also season a Dutch oven in your fireplace. I installed a cast iron pot hanger to the back wall of my fireplace so I could hang my ovens over the fire. If your chimney flu has a good draw you won't get much grease smoke in your house, however, I still recommend opening a few windows and doors.
Now, using a paper towel or a clean 100% cotton rag, apply a thin layer of cooking oil. I prefer using vegetable oil over peanut and olive oils because the burning point of vegetable oil is lower so it will set up and harden at lower temperatures. Tallow or lard can also be used but they tend to break down over time so are not recommended on ovens that will be stored for long periods of time. Make sure the oil covers every inch of the oven, inside and out and replace it on the center rack, this time upside down with the lid resting on top of the legs. This will keep oil from pooling in the bottom of the oven. Bake the oven for about an hour or so at 375°. This baking hardens the oil into a protective coating over the metal.
After baking, allow the Dutch oven to cool slowly. When it is cool enough to handle, apply another thin coating of oil. Repeat the baking and cooling process. When the oven can be handled again apply another thin coating of oil. Do not leave any standing oil in the oven! Standing oil can turn rancid ruining the protective coating you just applied. Allow the oven to cool completely. Now it should have three layers of oil, two baked on and one applied when it was warm. The oven is now ready for use.
This seasoning procedure only needs to be done once, unless rust forms or the coating is damaged in storage or use. This baked on coating will darken and eventually turn black with age. This darkening is a sign of a well kept oven and of it's use. The seasoning's purpose is two fold, first and most important, it forms a barrier between moisture in the air and the surface of the metal. This effectively prevents the metal from rusting. The second purpose is to provide a nonstick coating on the inside of the oven. When properly maintained, this coating is as nonstick as most of the commercially applied coatings.
Note: Avoid cooking anything with a high acid content such as tomatoes, or a lot of sugar such as cobblers for the first 2 or 3 times after seasoning your oven. The acid and sugars can break down the protective covering before it has a chance to harden properly.
Aluminum Dutch ovens do not require a "seasoning". Most aluminum ovens are shipped with a protective coating and a simple washing with soap and hot water will remove it. Since aluminum doesn't rust, no further protection is required. However, if you season an aluminum oven like you do a cast iron oven, food will not stick in it as often as it would if left untreated.
Dutch oven care starts with the seasoning of the metal, but the second step is to make sure you clean your ovens properly after each use. More often than not, cleaning cast iron Dutch ovens is much easier than scrubbing pots and pans. For cast iron, the cleaning process is in two steps. First, food is removed and second, maintenance of the protective coating. To remove stuck on food, place some warm clean water into the oven and heat until almost boiling. Using a plastic mesh scrubber or coarse sponge and No Soap, gently break loose the food and wipe away. After all traces have been removed, rinse with clean warm water. Soap is not recommended because it will break down the protective covering and will get into the pores of the metal to taint the flavor of your next meal.
After cleaning and rinsing, allow the oven to air dry. Then heat it over the fire just until it is hot to the touch. Apply a thin coating of oil to both the inside and outside of the oven and the top and underside of the lid. Allow the oven to cool completely. If you do not oil the outside of the oven, then with use, the protective barrier will break down and the oven will start to rust. As a suggestion, it is a good idea to keep a scrubber for cast iron and never use it with soap.
For aluminum ovens, the cleaning is the same as for ordinary pots and pans. Use soap and water and scrub them as you would your other pans.
Stripping Rusty Or Rancid Dutch Ovens
Inevitably there will come a time when you will need to strip and re-season a rusting or rancid Dutch oven. Relax! It's not that difficult. I've found the easiest way to strip an oven is to place it upside down on the bottom rack of a self cleaning oven with the lid placed on top of the legs. Set the oven to self clean for 2 hours and let it be. Allow the oven to cool completely before removing the Dutch oven.
If you don't have a self cleaning oven or would prefer not to heat up your house then you can use an outdoor propane stove to accomplish the same thing. I like to use my Cache Cooker for this because it has a large burner that generates a lot of heat. The secret to successfully stripping an oven over a propane burner is to keep moving the oven around so every surface of the oven has a chance to be directly over the burner, this also helps prevent warping should the metal become to hot. Light the burner and adjust it to generate a medium blue flame. Place the Dutch oven upside down over the flame and let it slowly heat for 10 minutes or so. Once the oven is hot turn up the burner to it's hottest setting and let the oven heat until it smokes heavily for about 5 minutes then rotate the oven to burn a new surface. Make sure to burn both the inside and the outside of the oven. As the metal burns it will take on a shiny oily look and may look white in some areas which is fine, keep heating the oven until all surfaces inside and out have this look then remove the oven from heat and allow it to cool slowly.
Once the Dutch oven has been burned and allowed to cool the remaining detritus must be removed from the oven surfaces. This is done by scrubbing the oven with a piece of steel wool or a metal scouring pad under hot running water until all surfaces are clean. Once clean, towel dry the oven then allow it to air dry. The Dutch oven is now ready to re-season.
Recently I came across this interesting web page authored by Bill Dickerson entitled Rust Removal By Electrolysis where Bill has documented how to clean rusty metal and cast iron using electricity, water, and a little washing soda. He has included pictures of his setup so you can see how the process works. The setup takes a little time and a few items but the results look fantastic (he's cleaning car parts but rusty Dutch oven's or cast iron pans will clean just as well).
It is important when storing your Dutch ovens to keep the lid cracked so that air can circulate into it. This can be accomplished by laying a paper wick, made from a napkin or paper towel folded accordion style, across the rim of the oven leaving a small amount outside, and then setting the lid down on top of it. The wick also acts to draw any moisture out of the oven. If air cannot circulate into the Dutch oven, the oil used to protect it will turn rancid and will permeate the pores of the metal with a sour odor. DO NOT cook anything in a rancid oven, you will not be able to stomach the food! A rancid oven must be stripped of its protective coating and then be re-seasoned again.
When storing my Dutch ovens I like to put them in a protective cover to keep them from collecting dust, and to keep anything that might brush up against them from getting dirty. The covers also help protect the outside finish on the ovens from being scratched up in transit when camping or transporting ovens.
1. Never, and I repeat, NEVER allow cast iron to sit in water or allow water to stand in it. It will rust despite a good coating.
2. Never use soap on cast iron. The soap will get into the pores of the metal and won't come out very easy, but will return to taint your next meal. If soap is used accidentally, the oven should be re-seasoned, including removal of the present coating.
3. Do not place an empty cast iron pan or oven over a hot fire. Aluminum and many other metals can tolerate it better but cast iron will crack or warp, ruining the metal.
4. Do not get in a hurry to heat cast iron, you will end up with burnt food or a damaged oven or pan.
5. Never put cold liquid into a very hot cast iron pan or oven. They will crack on the spot!
Regulating cooking temperature is by far the hardest thing to master when learning to cook in a Dutch oven. Hopefully the few tips I have to offer will help you out.
First and foremost, always use high quality briquettes. I recommend using Kingsford charcoal. Kingsford is packed tighter than most other brands so it won't pop and spit, and it tends to burn longer than other brands. Avoid using "Match Light" charcoal as it burns hot so it doesn't last as long. Kingsford charcoal will generate good heat for about an hours time. For recipes that take more than an hour to cook, after an hour remove the remaining briquettes and ash from the oven and replenish them with new briquettes. Note: because the Dutch oven is already hot, you will not need as many briquettes as when you started cooking. I usually remove 2-3 briquettes from the top and bottom the first time I replenish them.
The general rule of thumb to produce about a 350° heat is to take the size of the Dutch oven in inches, double the number, and use that many total briquettes. So, for a 12" oven you would use 24 briquettes, for a 14" oven you would use 28 briquettes, etc.. Remember this is just a rule of thumb and does not work for all makes of ovens! This rule for instance does not work when cooking with MACA deep Dutch ovens because they are much deeper and they are manufactured with more metal. This will be better explained below.
Lodge
Cast
Iron Mfg. has recently put out a baking temperature chart for use with
their
ovens listing the total number of briquettes necessary to bring an oven
to
different temperatures. To view a PDF copy of the chart 
Generally speaking each briquette will produce about 10° - 15° F. worth of heat on a moderately warm day with no wind. However, do not use these numbers to try and formulate how many briquettes you should use to generate internal oven temperatures. Instead, use the general rule of thumb to calculate the number of briquettes to reach 350° F. and then add or subtract briquettes to reach the temperature you desire. Why shouldn't you use the heat values to determine temperature? The answer is, other factors such as the amount of metal used to manufacture the oven, the size of the oven (volume), and the amount of free airspace inside the oven affect the final internal temperature the oven will reach when using a set number of briquettes. The more metal, volume of food, and internal air space you have to heat up, the more heat will be required to bring your oven to the desired temperature.
Other factors such as ambient air temperature, humidity, altitude, and wind all influence how much heat is generated by burning briquettes. Cool air temperatures, high altitudes, shade, and high humidity will decrease the amount of heat generated by briquettes. Hot air temperatures, low altitude, direct sunlight, and wind will increase the amount of heat generated by briquettes. Also note that in windy conditions briquettes will burn faster due to the increased air flow around them, so they will not last as long.
Heat placement around the Dutch oven is crucial to yield the best cooking results. Briquettes placed under the oven should be arranged in a circular pattern no less than 1/2" from the outside edge of the oven. Briquettes placed on the lid should be spread out in a checkerboard pattern. Try to avoid bunching the briquettes as this causes hot spots.
The number one question I am asked is "How many briquettes should I put on the lid and how many should go underneath the oven?". The answer is "It depends on what you are cooking".
For food you wish to simmer such as soups, stews, and chili's; place 1/3 of the total briquettes on the lid and 2/3 under the oven.
For food you wish to bake such as breads and rolls, biscuits, cakes, pies and cobblers (rising); place 2/3 of the total briquettes on the lid and 1/3 underneath the oven.
For food you wish to roast such as meats, poultry, casseroles, quiche, vegetables, and cobblers (non-rising); use an even distribution of briquettes on the lid and underneath the oven.
The golden rule of Dutch oven cooking is "go easy with the heat". If the oven isn't hot enough you can always add more briquettes, but once food is burned, it's burned.
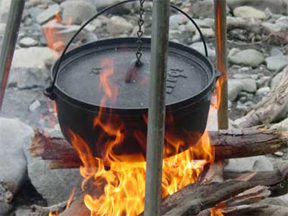
Campfire Cooking with Dutch Ovens
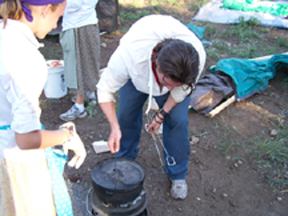
The first method involves using charcoal briquettes which are lit in the campfire. I prefer to use charcoal for cooking as opposed to cooking over an open fire because temperatures can be easily regulated with briquettes whereas an open fire is riddled with hot spots that can lead to burned food if your Dutch ovens are not watched carefully. I simply add a pile of charcoal to the center of the campfire to be started by the flames. Once the charcoal is lit, the briquettes are removed from the fire and arranged for cooking near the edge of the fire pit away from the campfire flames. Then cooking proceeds just like it would at home.
The second method entails burying your Dutch oven in coals and is about like cooking in a crock pot set on low heat. I usually use this method when out hunting or fishing (in a campfire safe area) and I don't want to spend a lot of time over my ovens. It starts by digging a hole 18-20 inches deep and 20-24 inches in diameter in the center of the campfire pit. Line the sides of the hole with flat stones and check to make sure the oven will fit in the hole. Next, start a campfire in the bottom of the hole to get coals going. Keep adding wood to the fire until the hole is 1/2 - 2/3 full of coals. Next kick the fire out and remove the larger pieces of remaining wood. Dig a hole in the coals that the Dutch oven containing the evening meal can be set in then cover the Dutch oven with the remaining coals (you want at least 2-3" of coals on top of the lid) followed by a 2" layer of dirt spread out over the coals. Spread 2 wet burlap bags over the dirt and cover them with rocks so they won't be blown away in the event a wind comes up. The burlap bags will help to hold the heat in. Then leave the oven to sit for the day. When you return to camp in the evening the food will be ready for eating. Simply dig the oven up and brush it off with a whisk broom prior to opening it.
Many problems can be avoided by watching your ovens while you are cooking so don't be afraid to lift your oven lids to check on your food. If you see steam escaping from around your oven lids then your ovens are to hot. Dutch ovens act as a sort of pressure cooker steaming the food from the inside out making it more tender. If you let the steam out of your Dutch oven, it doesn't help the food and more often than not the top or bottom will be burned.
To keep from generating hot spots which cause uneven browning and burned spots, rotate your Dutch ovens every 15 minutes by turning the oven 90° in one direction and the lid 90° in the opposite direction. The easiest way to manage this is to lift the lid, rotate the oven 90° clockwise, then put the lid back on so it is facing the same way it was when you lifted it. I usually look at the number cast on the lid when I do this. When rotating the oven properly the number on the lid should stay in the same place during the whole cooking process.
When I lift the lid to rotate my ovens I usually peek inside to see what the food is doing. This way I know if the oven temperature is right or if I need to adjust the number of briquettes.
"Stacking" your Dutch ovens is a convenient way to save space and share heat. Stacking is best done when ovens need the same amount of heat on top and bottom. (I.E. - Do not mix and match ovens that require different amounts of heat on top and bottom. Placing an oven with a cake, pie, or rolls in it, on top of an oven loaded with coals on the lid is not a very good idea.)
A Dutch oven lid can be placed over the fire or stove upside down and used as a skillet or griddle. Using the lid in this fashion, you can make virtually error free pancakes and eggs that don't run all over. This is because most lids are shaped like a very shallow bowl so things naturally stay in the center, even if the lid is not level.
Many people have asked me how to turn an upside down cake out of an oven without getting cake everywhere. Here's the method I use: First, let the cake cool for 10 minutes or so in the oven with the lid cracked. Next run a rubber spatula around the inside edge of the oven to loosen the cake. To turn the cake out, first lay a piece of parchment paper across the top of the oven so it lays flat and replace the lid so that it holds the paper in place. Make sure you have an available lid stand resting on your table for the next step. Using gloved hands place one hand on the oven lid and your other hand under the oven and carefully flip the oven over so the cake falls onto the lid. Rest the oven upside down on the lid stand and tap the bottom and sides of the oven lightly with your hand to make sure the cake didn't stick. Then lift the oven off the lid. The cake will be resting on the parchment lined lid and can be cooled this way or slid off the lid using the parchment paper.
Selecting the right Dutch Oven
With so many sizes and shapes of Dutch ovens to pick and choose from, selecting the right oven is a big key to cooking great food. Shorter standard ovens spread heat to the center of the oven faster than deeper ovens so they are good for cooking foods that need higher temperatures. Deep Dutch ovens on the other hand are ideal for cooking foods at lower temperatures or where you want to control the amount of heat on top of the oven for things such as rolls and bread where you want even browning. The oven size in inches (diameter and depth) will determine how much room you have for your food.
|
Sizes And Capacities Of Lodge Dutch Ovens |
||||
|
Oven Size |
Oven Capacity |
Depth |
Weight |
Types Of Dishes |
|
8" |
2 Quarts |
3" |
11 lbs. |
Side dishes, vegetables, desserts, and sauces. Ideal when cooking for 2 or 3 people. |
|
10" |
4 Quarts |
3 ½" |
15 lbs. |
Side dishes, vegetables, beans, small roasts, desserts, and sauces. |
|
12" |
6 Quarts |
3 ¾" |
20 lbs. |
Roasts, poultry, fish, stews, potatoes, beans, rolls, breads, and desserts. |
|
12" D |
8 Quarts |
5" |
23 lbs. |
Standing rib roasts, hams, whole chickens, stews, potatoes, beans, rolls, and breads. |
|
14" |
8 Quarts |
3 ¾" |
26 lbs. |
Larger roasts, poultry, stews, potatoes, rolls, breads, and desserts. |
|
14" D |
10 Quarts |
4 ½" |
28 lbs. |
Standing rib roasts, hams, hens, stews, potatoes, rolls, and breads. |
|
16" |
12 Quarts |
3 ¾" |
32 lbs. |
Large quantities of meat, stews, potatoes, rolls, breads, and desserts. |
|
Sizes And Capacities Of MACA Dutch Ovens |
||||
|
Oven Size |
Oven Capacity |
Depth |
Weight |
Types Of Dishes |
|
9" |
5 Quarts |
6" |
17 lbs. |
Soups and stews, beans, vegetables, and sauces. |
|
11" |
9 Quarts |
6 ½" |
24 lbs. |
Smaller standing rib roasts, small hens, vegetables, stews, potatoes, and beans. |
|
13" |
12 Quarts |
6 ½" |
41 lbs. |
Standing rib roasts, hams, whole chickens, stews, potatoes, and beans. |
|
15" |
18 Quarts |
7 ½" |
49 lbs. |
Small turkeys (up to 15 lbs.), large cuts of meat, stews, and beans. |
|
17" |
28 Quarts |
9" |
73 lbs. |
Larger turkeys (up to 30 lbs.), large quantities of meat, stews. |
|
22" |
49 Quarts |
9 ½" |
158 lbs. |
We call these "drag and drops" because you drag them out of your truck and wherever they drop you cook in them. |
DUTCH OVEN RECIPES
1 lb. bacon 10-12 medium potatoes; sliced
2 medium yellow onions; diced 12 eggs; beaten
1 1/2 cups fresh mushrooms; sliced Salt and pepper to taste
1 green bell pepper; diced 3 cups grated Cheddar cheese
3 cloves garlic; minced picante sauce
Heat
a 12" Dutch oven using 18-20 briquettes bottom until hot. Cut bacon
into 1
inch slices. Add to Dutch oven and fry until brown. Add onion,
mushrooms, bell
pepper and sauté until onions are translucent. Add potatoes and season
with
salt and pepper. Cover and bake using 8 briquettes bottom and 14-16
briquettes
top for 30 minutes. Season eggs with salt and pepper then pour eggs
over top of
potatoes. Cover and bake another 20 minutes. Stir gently every 5
minutes. When
eggs are done, cover top with cheese and replace lid. Let stand until
cheese is
melted.
Serve topped with picante sauce.
1 1/2 cups milk 6 Tbs. butter
9 eggs lemon juice
1 1/2 cups flour powdered sugar
3/4 tsp. salt
In a mixing bowl whisk together milk, eggs, flour, and salt to form a thin batter.
Heat a 14" Dutch oven using 14-16 briquettes bottom and 18-20 briquettes top until very hot. Add butter to Dutch oven and let melt. Pour batter into oven and cook for 25-30 minutes until pancake is fluffy and light brown.
Sprinkle pancake with lemon juice and dust with powdered sugar.
Serves: 6
4 cups all-purpose flour 1/2 cup Crisco
2 Tbs. baking powder 2 cups cold milk
2 tsp. salt
To a mixing bowl add flour, baking powder, and salt. Stir together using a fork. Cut in the Crisco until the mixture is like coarse meal with no lumps larger than a green pea. Add milk to the mixture and stir it with a fork until there are no areas of dry flour. You want the dough to be sticky and moist. This is what makes baking powder biscuits so tender and flaky.
Generously flour a large cutting board or smooth counter top making sure to coat your hands in flour too. Scoop the dough out of the bowl and put it on the floured surface. With the palm of one (or both) hands, press down on the dough and push it away from you. The dough will stretch into the shape of an oval. Next, lift the far end of the oval and bring it towards you, so it resembles a thick taco shell with the opening facing towards you. Then, rotate the dough a quarter turn and repeat the process, gently pushing, folding and turning, about 10 times. If dough begins to stick to your hand, it is fine to use a little more flour to cut the stickiness. Pat the dough into a circular shape about 1/2" thick.
Using a 2" cookie or biscuit cutter cut out biscuits by pressing cutter into the dough and then lifting it straight out. Make sure not to twist the cutter as this releases air in the dough causing the biscuits to turn out flat. Place biscuits in a greased 14" Dutch oven leaving 1/2" space between.
Place lid on Dutch oven and let raise for 10 minutes then bake using 12-14 briquettes bottom and 18-20 briquettes top (400° F.) for 15-20 minutes.
NOTE: For even browning make sure to turn the oven and lid 1/4 turn in opposite directions every 5-10 minutes.
Serve warm.
Yield: About 18 biscuit
1 cup butter; melted 2 cups cornmeal
4 eggs; beaten 3 cups all-purpose flour
3 cups milk 4 tsp. baking powder
2 cups sugar 1 tsp. salt
In
a large bowl mix together butter, eggs, and milk. In a separate bowl
sift
together sugar, cornmeal, flour, baking powder, and salt. Mix dry
ingredients
into wet ingredients 1 cup at a time until well blended. Spoon
cornbread
mixture into a lightly greased 12" Dutch oven and spread evenly.
Cover Dutch oven and bake using 8-10 briquettes bottom and 14-16 briquettes top for 45 minutes or until cornbread turns golden brown.
NOTE: For even browning make sure to turn the oven and lid 1/4 turn in opposite directions every 10 minutes.
Serve warm with honey butter.
Serves: 10-12
4 cups sour milk 2 cups whole wheat flour
4 eggs; beaten 1/3 cup sugar
1/4 cup butter; melted 2 tsp. baking soda
4 cups cornmeal 1 tsp. baking powder
2 cups all-purpose flour 1 tsp. salt
In a large bowl mix together milk, eggs, and butter. In a separate bowl sift together cornmeal, flours, sugar, baking soda, baking powder, and salt. Mix dry ingredients into wet ingredients 1 cup at a time until well blended. Spoon mixture into a lightly greased 12" Dutch oven and spread evenly.
Cover Dutch oven and bake using 8-10 briquettes bottom and 14-16 briquettes top for 45 minutes or until golden brown.
NOTE: For even browning make sure to turn the oven and lid 1/4 turn in opposite directions every 10 minutes.
Serve warm with honey butter.
Serves: 12-16
1 1/2 cups catchup 2 tsp. liquid smoke
1 cup white vinegar 1 tsp. salt
1/2 cup balsamic vinegar 1/2 tsp. garlic powder
3/4 cup molasses 1/2 tsp. onion powder
3/4 cup honey 1/2 tsp. Tabasco Sauce
In
a 10" Dutch oven combine all ingredients and whisk until smooth. Cook
using 14-16 briquettes bottom until mixture comes to a boil. Reduce
briquettes
on bottom to 10 and let simmer uncovered for 30-40 minutes until sauce
thickens
slightly.
Yield: About 4 cups
Dutch Oven Rabbit (substitute chicken if desired)
1/2 lb. smoked sliced bacon; cut into 1" pieces 4 cloves garlic; minced
1 tsp. dry rosemary; crumbled 1 yellow onion; chopped fine
1 (3 lb.) rabbit(or chicken); cut into pieces 1 1/2 cup sliced fresh mushrooms
1/2 cup all-purpose flour 3/4 cup beef stock
1 tsp. seasoned salt 2 Tbs. balsamic vinegar
1 tsp. coarse ground black pepper 1 cup sour cream
Heat
a 12" Dutch oven using 18-20 briquettes bottom until hot. Add bacon to
hot
oven and fry until half cooked. Add rosemary.
In a large bowl combine flour, seasoned salt and black pepper; stir to mix. Dredge rabbit pieces in seasoned flour then add to Dutch oven. Fry rabbit pieces with bacon until brown on all sides. Add garlic, onion and mushrooms and continue cooking until vegetables are soft and onions are translucent. Combine beef stock and vinegar; pour over all then cover oven. Replenish briquettes with 10-12 on bottom and 14-16 on the lid; bake for 1 hour. After an hour stir in sour cream then replenish briquettes with 8-10 on bottom and 12-14 on the lid and continue cooking an additional 45-60 minutes or until rabbit is tender.
Serve over steamed white rice or cooked fettucini noodles.
Serves: 6
1 lb. lean ground beef 2 (32 oz.) cans stewed tomatoes
6 cups dry red or pinto beans 1-2 cups honey (to taste)
2 large yellow onion; diced 2 tsp. cinnamon
8 cloves garlic; minced 1 tsp. cloves
1 lb. bacon; cubed 1 tsp. allspice
2 tsp. salt 2 Tbs. chili powder
1 1/2 tsp. ground black pepper 1-2 tsp. tabasco (optional)
HOT water to cover beans
Brown ground beef in a well oiled 12" deep Dutch oven using 18-20 briquettes bottom. Add beans, onion, garlic, uncooked bacon, salt, pepper, and enough hot water to cover beans. Cover and simmer using 14-16 briquettes bottom and 10-12 briquettes top for 1-2 hours or until beans are tender adding additional water as necessary.
Stir in tomatoes, honey, and remaining seasonings. Cover and continue to simmer for 1 hour.
|
8 |
lbs. beef back ribs; well trimmed |
4 |
cloves garlic; minced |
|
|
Emeril's Rustic Rub* to taste |
3 |
Tbs. dry minced onion |
|
1 |
(12 oz.) bottle hickory barbecue sauce |
1-2 |
tsp. red pepper flakes (to taste) |
|
1 |
(12 oz.) bottle chili sauce |
|
|
|
Separate ribs by cutting between the bones so they are in single rib pieces. Trim excess fat from both skin and membrane sides of each rib. Season ribs with Emeril's Rustic Rub then place in a large ziploc bag and refrigerate for 1 hour. Arrange ribs in a 12" deep Dutch oven. In a medium bowl mix together the remaining ingredients and spoon over ribs. Cover oven and bake using 8-10 briquettes bottom and 14-16 briquettes top (325° F.) for 2 hours. Baste with pan drippings every 15-20 minutes. Replenish briquettes after 1 hours cooking time. *The recipe for Emeril's Rustic Rub can be found on my Recipes page under Seasonings. Serves: 8 |
This is the recipe for Emeril Lagasse's "Rustic Rub" seasoning as found on the Food Network recipe pages.
|
2 |
Tbs. + 2 tsp. paprika |
1 |
Tbs. cayenne pepper |
|
2 |
Tbs. garlic powder |
1 |
Tbs. onion powder |
|
2 |
Tbs. salt |
2 1/2 |
tsp. dried oregano |
|
1 |
Tbs. + 2 tsp. ground black pepper |
2 1/2 |
tsp. dried thyme |
|
Combine all ingredients thoroughly and store in an airtight jar or container Yields 3/4 cup. |
|
1 |
lb. thick slice bacon |
(1) |
10 ½ oz. can cheddar cheese soup |
|
2 |
med. yellow onions; sliced |
1 |
cup sour cream |
|
5 |
cloves garlic; minced |
2 |
Tbs. Worcestershire Sauce |
|
1 1/2 |
cup fresh mushrooms; sliced |
1 |
Tbs. Soy sauce |
|
15 |
medium potatoes; peeled & sliced |
|
salt and pepper to taste |
|
(1) |
10 ½ oz. can cream of chicken soup |
|
|
|
Heat a 12" deep Dutch oven using 18-20 briquettes bottom until oven is hot. Cut bacon into 1 inch slices and place in oven and fry until brown. Add onions, garlic, and mushrooms. Stir, then cover and cook until onions are translucent. Add potatoes. In a large bowl combine remaining ingredients and mix well. Pour soup mixture over potatoes and stir until all potatoes are coated. Cover and cook 60 minutes using 10-12 briquettes bottom and 12-14 briquettes top heat. Stir pot gently every 15 minutes. Serves: 12
|
|
1 |
lb. bacon |
1/4 |
cup honey |
|
8 |
chicken breasts; cut into chunks |
2 |
tsp. ground oregano |
|
3 |
cloves garlic; minced |
2 |
tsp. basil |
|
1 |
large yellow onion; sliced |
1 1/2 |
tsp. parsley |
|
6 |
large tomatoes; diced |
1 |
tsp. salt |
|
1 |
red bell pepper; cut into chunks |
1 |
tsp. ground black pepper |
|
1 |
green bell pepper; cut into chunks |
3 |
cups Mozzarella cheese; grated |
|
1 |
cup mushrooms; sliced |
3 |
cups Cheddar cheese; grated |
|
(1) |
10 3/4 oz. can tomato puree |
1/2 |
cup Parmesan cheese; grated |
|
1/4 |
cup balsamic vinegar |
|
|
|
Heat a 12" Dutch oven using 20-22 briquettes bottom. Slice bacon into 1" strips then add to hot oven and fry until brown. Remove bacon from oven. Remove and reserve all but 2 Tbs. of the bacon grease from the oven. Add chicken and garlic to oven and cook, turning frequently, until juices run clear when chicken is pierced with a fork. Remove chicken from oven and add reserved bacon grease. Line the bottom of the oven with onion slices then put chicken on top of the onion. Add tomatoes, red and green bell pepper, and mushrooms. Cover and bake using 12 briquettes bottom and 12-14 briquettes top for 30 minutes. In a large measuring cup make a sauce with the tomato puree, balsamic vinegar, honey, oregano, basil, parsley, salt, and pepper. Stir to mix well. Sprinkle bacon over top of cooked vegetables then pour sauce over vegetables. Cover and bake another 15 minutes. Sprinkle cheeses over the top. Replace lid and let sit for 15 minutes until cheese is melted. Serves: 16 |
|
6 |
chicken breast halves; boneless, skinless |
(1) |
4 oz. can diced green chilies; drained |
|
1 |
packet taco seasoning |
(1) |
11 oz. can mexicorn; drained |
|
8 |
oz. pepper jack cheese |
(1) |
15 oz. can black beans; drained |
|
1/4 |
cup melted butter |
(1) |
16 oz. can diced tomatoes |
|
1/2 |
cup melted butter |
1/2 |
cup black olives; sliced |
|
1/2 |
cup corn flakes; crushed |
1/2 |
cup green onions; sliced |
|
Place 1 chicken breast between 2 pieces of waxed paper and gently pound with a meat mallet until about 1/8" thick. Repeat with remaining chicken breasts. Sprinkle about 1/2 tsp. of taco seasoning on the boned side of each breast. Place a 1/2" x 1 1/2" slice of pepper jack cheese on each chicken breast then roll up jelly roll fashion. Tuck in ends and seal well with a toothpick. Dip each chicken roll in melted butter then roll in corn flake crumbs, turning to thoroughly coat each roll. Place in a lightly greased 12" Dutch oven. Bake using 10-12 briquettes bottom and 16-18 briquettes top for 35-45 minutes or until chicken is lightly browned. Remove chicken from oven and remove toothpicks. Wipe the oven clean with a paper towel. In a large bowl mix together green chilies, mexicorn, black beans, tomato, olives, green onions and 2 Tbs. of the taco seasoning. Spoon vegetables into Dutch oven. Place chicken rolls on top of the vegetable mixture. Grate the remaining cheese and sprinkle over the chicken rolls. Cover and bake an additional 10-15 minutes until vegetables are warmed thru and the cheese has melted. Serves: 6 |
|
1 1/2 |
lbs. lean ground beef |
1/2 |
medium red onion; diced |
|
2 |
tsp. Italian seasoning |
3 |
Tbs. diced greeen bell pepper |
|
1 |
tsp. garlic powder |
3 |
Tbs. diced red bell pepper |
|
|
salt and black pepper to taste |
1 |
(8 oz.) can mushroom stems & pieces; drained |
|
2 |
Tbs. olive oil |
12 |
black olives; sliced |
|
1 |
can crescent rolls |
8 |
oz. shredded Cheddar cheese |
|
1 |
jar pizza sauce |
8 |
oz. shredded Mozzarella cheese |
|
Heat a 12" Dutch oven using 18-20 briquettes bottom until hot. In a medium bowl add ground beef, Italian seasoning, garlic powder, salt and pepper; mix together with your hands. Drop ground beef by small pieces into the hot Dutch oven and fry until brown. Remove browned beef from Dutch oven and wipe oven down with a paper towel. Pour olive oil into Dutch oven and spread evenly over bottom of oven. Unroll the can of crescent rolls and line the bottom of the oven with a layer of flattened rolls. Spoon pizza sauce evenly over crescent rolls. Sprinkle evenly with seasoned ground beef, red onion, bell peppers, mushrooms, olives, and top with Cheddar and Mozzarella cheeses. Cover and bake using 8-10 briquettes bottom and 16-18 briquettes top for 20-30 minutes until crust is browned on edges and cheese is bubbly. Serves: 6-8 |
|
5½ |
cups bread flour |
3/4 |
tsp. lemon extract |
|
2 |
Tbs. yeast |
1½ |
tsp. vanilla extract |
|
1/2 |
cup sugar |
2 |
eggs; beaten |
|
1/3 |
cup instant potato flakes |
|
|
|
1 |
Tbs. salt |
3/4 |
cup chopped macadamia nuts |
|
1/2 |
cup butter; melted |
2 |
Tbs. melted butter |
|
1 3/4 |
cups scalded milk; 125° F. |
|
poppy seeds |
|
In a mixing bowl combine 2 cups flour, yeast, sugar, potato flakes, and salt; blend well. Stir in milk, melted butter, extracts, and eggs. Mix thoroughly. Stir in remaining flour 1 cup at a time until dough pulls away from sides of bowl. Turn dough out onto a floured board and knead it for 5 minutes until dough becomes elastic and sticky. Roll dough generously in flour, then cover and place in a warm area free from drafts to raise until double in size. Place raised dough on a floured board and divide into thirds. Roll each piece of dough into equal length ropes about 3/4" in diameter. Roll each rope in chopped macadamia nuts pressing nuts lightly into the surface of the dough. Make a braid out of the 3 ropes leaving enough length on each end so you can braid them together. In a warm greased 12" Dutch Oven make a ring out of the braid and finish braiding the ends together. Cover the oven and let bread raise until double in size (about 30-45 minutes). Brush top of bread with melted butter and sprinkle with poppy seeds. Bake using 10 coals bottom and 16 coals top for 30-40 minutes. When top of bread starts to brown, remove the Dutch Oven from all heat and let rest with the lid on for about 5 minutes. The residual heat from the oven will finish baking the bread. Serves: 14 |
|
|
Bread |
|
Topping |
|
2 1/2 |
cups all purpose flour |
2 |
Tbs. chopped onion |
|
1 |
Tbs. active dry yeast |
1/4 |
cup melted butter |
|
1 |
Tbs. sugar |
1/2 |
tsp. paprika |
|
1 1/2 |
tsp. salt |
1/2 |
tsp. oregano |
|
3/4 |
cup milk; scalded |
1/2 |
tsp. garlic salt |
|
1/4 |
cup water |
1 |
cup cheddar cheese |
|
1 |
Tbs. butter; melted |
|
|
|
Prepare Dough: Add water to hot milk and let cool to 115° F. In a mixing bowl combine 1 cup flour, yeast, sugar, and salt; mix well. Stir in milk and butter. Mix thoroughly. Stir in remaining flour and work into a dough. Place dough on a lightly floured board and knead for 5-7 minutes until dough is elastic and sticky. Set dough in a greased bowl and turn dough over so top side of dough has been greased. Cover and place in a warm area free from drafts until dough has doubled in size. Prepare Topping: In a small bowl combine all ingredients and stir to mix. Assemble For Baking: Punch dough down then press into the bottom of a 14" Dutch oven. Prick dough with a fork then spread topping evenly across the top. Cover oven and let rise for 30 minutes. Bake using 12-14 briquettes bottom and 16-18 briquettes top for 20-25 minutes. Serves: 8 |
|
2 1/2 |
cups all-purpose flour |
1/2 |
cup Crisco |
|
3 |
Tbs. sugar |
2 |
cups sourdough starter |
|
1 |
Tbs. baking powder |
|
melted butter |
|
1 |
tsp. salt |
|
|
|
Make sure to feed your sourdough start and leave out to ferment prior to making biscuits. If you need a sourdough start I have a recipe here. To a mixing bowl add flour, sugar, baking powder, and salt. Stir together using a fork. Cut in the Crisco until the mixture is like coarse meal with no lumps larger than a green pea. Using a fork stir sourdough starter into the mixture until dough comes together. Generously flour a large cutting board or smooth counter top. Scoop the dough out of the bowl and put it on the floured surface. With the palm of one (or both) hands, press down on the dough and push it away from you. The dough will stretch into the shape of an oval. Next, lift the far end of the oval and bring it towards you, so it resembles a thick taco shell with the opening facing towards you. Then, rotate the dough a quarter turn and repeat the process, gently pushing, folding and turning, about 10 times. Cut dough into halves then cut each half into 9 equal sized pieces. Roll each piece of dough into a ball then dip in melted butter and place in a greased 14" Dutch oven, 11 around the outside edge, 6 in an inner circle, and 1 in the middle. Try to leave a 1/2" space in between dough balls. Place lid on Dutch oven and let biscuits raise for 20-25 minutes. Bake using 12-14 briquettes bottom and 18-20 briquettes top (400° F.) for 20-25 minutes until golden brown. NOTE: For even browning make sure to turn the oven and lid 1/4 turn in opposite directions every 5-10 minutes. Serve warm. Yield: 18 biscuits |
|
2 |
cups unsifted flour |
1 1/2 |
cups warm water |
|
2 |
Tbs. sugar |
1 |
Tbs. vinegar |
|
1 |
Tbs. salt |
1/4 |
tsp. dry yeast |
|
Prepare Starter: Combine flour, sugar, salt, and yeast in a stone crock or bowl. Stir to mix well. Add water and beat to a smooth batter. Add vinegar. Cover with cheesecloth and set in a warm place until thoroughly sour. (Determine this by the yeasty smell.) Takes about 12 hours. Pour starter into a quart jar, cover jar, and refrigerate. For best results the start should be used once per week, however, starter can be frozen indefinitely. To Use Start: Pour starter into a clean glass bowl. Add 2 cups warm water (90° F.) and 2 1/2 cups flour. Stir to mix (don't worry about lumps). Batter will be thick but will thin as it ferments. Cover bowl with cheesecloth and place in a warm spot to rest for 12 hours. Pour 3 cups of the sourdough into a quart jar, cover the jar, and refrigerate for up to 2 weeks for use as the next starter. This leaves about 4 1/2 cups of sourdough for use in your recipe. NOTE: Never add anything but warm water and flour to the start. |
|
1 1/2 |
cup scalded milk |
1 1/2 |
Tbs. active dry yeast |
|
2 |
Tbs. butter |
1 1/2 |
Tbs. sugar |
|
3 |
Tbs. honey |
2 |
tsp. salt |
|
3 |
cups sourdough starter |
1 1/2 |
tsp. baking soda |
|
1 1/2 |
cup whole wheat flour |
1 1/2 |
cup white flour |
|
1 1/2 |
cup oatmeal |
|
|
|
Stir butter and honey into scalded milk, then add to sourdough starter. Stir in wheat flour, oatmeal, and yeast. Blend together sugar, salt and soda; sprinkle over top of dough and stir in gently. Cover dough with a cloth and let rise in a warm place for 20 minutes. Stir in remaining flour until dough is too stiff to stir with a spoon. Knead dough with heel of hand 100 times only or bread will be too dry. Dough should not be heavy and feel a bit tacky. Add dough to a lightly greased 12" Dutch oven and press flat. Using your fingers, lightly grease the top of the dough. Place lid on Dutch oven and let rise in warm place for 30-45 minutes. Bake bread using 10-12 briquettes bottom and 18-20 briquettes top for 20 minutes then remove 4 briquettes from the lid and 2 from below and continue baking until bread shrinks from the side of the oven or gives a hollow sound when thumped on top, about 15-20 minutes. Tip bread out onto a wire rack and butter top. Serves: 10-12. |
|
8 |
large granny smith apples; peeled, cored, sliced and quartered |
2 |
Tbs. flour |
|
1/2 |
cup dried currants or raisins |
1 |
tsp. ground cinnamon |
|
1/2 |
cup chopped walnuts |
1 |
tsp. ground nutmeg |
|
1 |
cup packed dark brown sugar |
1 |
spice cake mix; prepared as directed |
|
In a 12" Dutch oven add apples, currants, walnuts, brown sugar, flour, cinnamon, and nutmeg and stir until well mixed and apples are well coated. Pour cake batter over top of apples and spread evenly. Bake using 14-16 briquettes top and 8-10 briquettes bottom for 60 minutes or until top center of cake springs back when touched. Serve with whipped cream. Serves: 16 |
Cherry Chocolate Surprise Cake
|
1 |
chocolate cake mix; prepared as directed |
1 |
egg |
|
1 |
(20 oz.) can cherry pie filling |
3 |
Tbs. sugar |
|
1 |
(8 oz.) brick cream cheese |
1 |
tsp. vanilla |
|
Pour prepared cake batter into a greased 12" Dutch oven. Spoon cherry pie filling into clumps over cake batter. In a small mixing bowl cream together cream cheese, egg, sugar, and vanilla until smooth. Drop by tablespoons over top of cake. Place lid on oven. Bake using 8-10 briquettes bottom and 14-16 briquettes top for 1 hour or until top center of cake springs back when touched. Serve warm with whip cream as topping. Serves: 10-12 |
|
1 |
yellow cake mix; prepared as directed |
|
Mud |
|
|
|
1/2 |
cup cocoa powder |
|
|
Topping |
2 |
cups brown sugar |
|
10 |
oz. bag semi-sweet chocolate chips |
1 |
cup hot water |
|
3/4 |
cup chopped pecans |
2 |
tsp. vanilla |
|
|
powdered sugar |
1 |
tsp. cinnamon |
|
Line the bottom and sides of a 12" Dutch oven with heavy foil. To the oven add prepared cake mix. Prepare The Mud: In a separate bowl combine all "Mud" ingredients and stir until well mixed. Pour mud mixture over the cake batter. Bake: Cover Dutch oven and bake using 8-10 briquettes bottom and 14-16 briquettes top for 60-90 minutes replenishing coals after 60 minutes if cake is not done. Sprinkle chocolate chips and pecans over top of cake about 5 minutes before cake is done. Dust top of cake with powdered sugar just before service. Serve warm with whipped cream. Serves: 10-12 |
|
|
Filling |
|
Topping |
|
8 |
cups Granny Smith apples; thinly sliced |
2 |
cups flour |
|
1 |
cup dried currants or raisins |
2 |
cups sugar |
|
1 |
cup sugar |
2 |
tsp. baking powder |
|
1 |
tsp. cinnamon |
1/2 |
tsp. salt |
|
1 1/4 |
cup coarsely chopped pecans; divided |
2 |
eggs; well beaten |
|
|
|
1 |
cup evaporated milk |
|
|
|
1/2 |
cup butter; melted |
|
Prepare Filling: Place apples in a buttered 12" Dutch oven. Sprinkle raisins over the apples. In a separate bowl combine sugar, cinnamon, and 1 cup of the pecans; stir to mix. Sprinkle cover top of apples. Prepare Topping: In a large bowl sift together the flour, sugar, baking powder and salt. In a separate bowl mix together eggs, evaporated milk and melted butter. Add liquid ingredients to dry all at once and mix until smooth. Pour batter over apples then sprinkle with remaining pecans. Cover and bake for 45 to 60 minutes using 8-10 briquettes bottom and 14-16 briquettes top until topping is golden brown. Serve with vanilla ice cream. Serves: 12-14 |
|
|
Apple Filling |
|
Crisp Topping |
|
1 |
cup dried currants |
1 |
cup all-purpose flour |
|
1/4 |
cup spiced dark rum |
1 |
cup old fashioned oats |
|
8-9 |
large granny smith apples; peeled, cored, and sliced |
1 |
cup brown sugar; packed |
|
1 |
lemon; juice from |
3/4 |
cup chopped pecans or walnuts |
|
1/3 |
cup instant tapioca |
1/2 |
tsp. ground cinnamon |
|
1 1/4 |
cups sugar |
1/2 |
cup + 2 Tbs. unsalted butter; chilled |
|
2 |
tsp. ground cinnamon |
|
|
|
3/4 |
tsp. grated nutmeg |
|
|
|
1/4 |
tsp. ground cloves |
|
|
|
3/4 |
tsp. salt |
|
|
|
Prepare Filling: In a large mixing bowl soak currants in 1/4 cup rum for 30 minutes. Add the remaining filling ingredients and stir to mix well. Cover with plastic wrap and set aside for 1 hour until juices run. Prepare Crisp Topping: In a medium mixing bowl add all topping ingredients except butter; stir to combine. Cut butter into small pieces and add to other ingredients. Use your fingers to work butter into flour mixture until coarse crumbs form. Assemble Crisp: Add prepared filling to a clean lightly oiled 12" Dutch oven; spread evenly. Sprinkle crisp topping evenly over top of filling. Cover oven and bake using 10-12 briquettes bottom and 18-20 briquettes top (375° F.) for about 1 hour until crisp is golden brown and filling is bubbly. For even browning make sure to rotate the base and lid of the oven a 1/4 turn in opposite directions every 10-15 minutes. Serve warm with vanilla ice cream or topped with whipped cream. Serves: 12-14 |
|
1 |
stick butter |
1 |
tsp. salt |
|
2 |
cups flour |
1 1/2 |
cup milk |
|
2 |
cups sugar |
2 |
(20 oz.) cans pie filling (your favorite) |
|
1 |
Tbs. baking powder |
1 |
tsp. ground cinnamon |
|
Melt butter in a 12" Dutch oven using 10-12 briquettes bottom heat. In a separate bowl combine flour, sugar, baking powder, and salt; stir to mix. Add milk and beat until batter is smooth. Pour batter over melted butter -- do not stir. Spoon pie filling by tablespoons over batter -- do not stir. Sprinkle cinnamon over the top. Cover and bake using 10-12 briquettes bottom and 18-20 briquettes top for 45 to 60 minutes rotating oven and lid 1/4 turn in opposite directions every 10 minutes until crust is golden brown. Serve topped with whipped cream or with vanilla ice cream. Serves: 12 |